With Windows 7, you now have some cool options for backing up and restoring your computer. I’ve previously written about backing up your computer using the built-in backup tool in Windows XP, but the new version is way better.
In Windows 7, when you perform a backup of your computer, the backup software will create a virtual hard disk file (VHD). If you have used Virtual PC 2007 before, you’ll know what I’m talking about.
You can also read my previous post on how to convert your PC into a virtual machine easily. Once you have a VHD file of your PC, you can load it up in Windows 7 and access the data just as if it was another drive on your computer.
Note that you can also use that VHD file to restore your entire computer to a previous state, but what if you just need some files or folders from a backup? Mounting a VHD backup in Windows 7 makes it really easy to copy data back and forth from the virtual machine.
To mount a VHD in Windows 7, you have to open Computer Management by clicking on Start and typing in compmgmt.msc in the search box. You can also go to Control Panel, then System and Security, then click on Administrative Tools and then click on Computer Management.
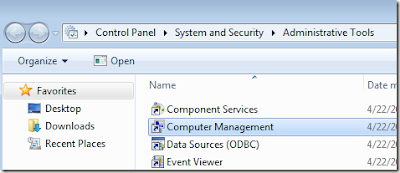
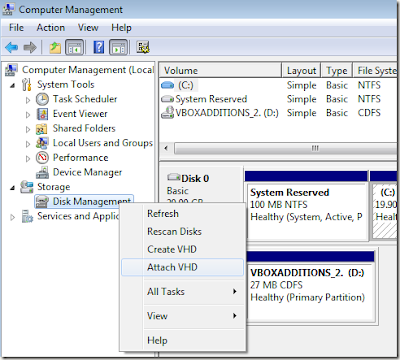
Now click on Disk Management on the left hand menu and wait for the list of drives and partitions to show up. Next, right-click on Disk Management and choose Attach VHD.
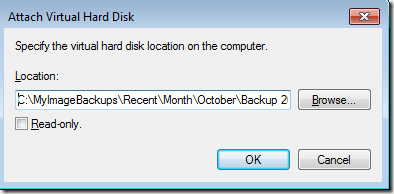
In the dialog box, go ahead and click Browse and navigate to the location of the VHD file that you want to mount. Then click OK.
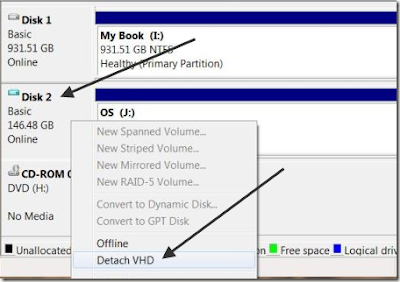
Once it has finished mounting, you will see it display as another Basic disk that is colored a light blue. At anytime, you can right-click on that disk and choose Detach VHD to un-mount the machine.
That’s pretty much it! It’s really easy and works very well in Windows 7! If you created a virtual machine (VHD) file from another program like Virtual PC or something else, it will mount in Windows 7. Enjoy!


