What is (Computer) Networking?Networking is the practice of linking computing devices together with hardware and software that supports data communications across these devices.
zSB(3,3)
Networking Basics Quiz / Q&AAnswer this series of common questions about basic computer networking concepts to quickly expand your knowledge of the topic.
Visual Networking BasicsThis guide presents the essential concepts of computer networks in a sequence of visual illustrations designed to teach networking basics by example.
Network File Sharing 101Computer networks allow you to share files with friends, family, coworkers and customers. Learn about the different methods for file sharing including Windows, FTP, P2P and Web based.
Connecting Two ComputersThe simplest kind of home network contains exactly two computers. You can use this kind of network to share files, a printer or another peripheral device, and even an Internet connection. To connect two computers for sharing network resources, consider these alternatives.
Introduction to Area Networks and Network TypesLAN and WAN are two common types of networks but many others exist.
Basic Network TopologiesOne way to classify computer networks is by their topology. Common network topologies include the bus, star, and ring.
Free Computer Networking BooksNumerous published books are available for free download on the Internet. However, not very many quality, free titles are available on basic computer networking topics.
Network RoutersA router is a small hardware device that joins multiple networks together. These networks can include wired or wireless home networks, and the Internet.
What Is a Network Protocol?Protocols serve as a language of communication among network devices. Network protocols like HTTP, TCP/IP, and SMTP provide a foundation that much of the Internet is built on. Find out more about these protocols and how they work.
What Is a Server?In computer networking, a server is a computer designed to process requests and deliver data to other computers over a local network or the Internet. Common types of network servers include Web, proxy and FTP servers.
TCP/IP - Transmission Control Protocol / Internet Protocol TCP/IP provides connection-oriented communication between network devices. TCP/IP is very commonly used both on the Internet and in home computer networks.
FirewallsA network firewall guards a computer against unauthorized network access. Firewalls are one of the essential elements of a safe home or business network.
Networking Basics: EthernetEthernet is a physical and data link layer technology for local area networks (LANs). Ethernet is reliable and inexpensive, the leading standard worldwide for building wired LANs.
Networking Basics: SwitchA network switch is a small hardware device that joins multiple computers together at a low-level network protocol layer. Switches differ in important ways from both routers and hubs.
Network AddressesNetwork addresses give computers unique identities they can use to communicate with each other. Specifically, IP addresses and MAC addresses are used on most home and business networks.
Basic Computer ArchitectureUnderstanding these concepts in computer architecture is essential to learning computer networking. Discover the fundamental elements of computer system and network architecture here.
"Computer Networking First-Step"Many books exist dedicated to home networking, specific network technologies like wireless or TCP/IP, or various academic networking topics. This one covers the overall field of computer networking.
zSbL=3;zSB(2);zSbL=0
June 27, 2009
How to set up a Router for Home Computer Networks.
This guide explains how to set up a router for home computer networks. The exact names of configuration settings on a network router vary depending on the model and whether it is wired or wireless. However, this general procedure will guide you through the process for the common kinds of home network equipment.
1.
Choose a convenient location to begin installing your router such as an open floor space or table.
This does not need to be the permanent location of the device. Particularly for wireless routers, you may find it necessary to re-position the unit after installing it as the cables / signals may not reach all areas needed. At the beginning, its better to choose a location where it's easiest to work with the router and worry about final placement later.
2.
Plug in the router's electrical power source, then turn on the router by pushing the power button.
3.
(Optional) Connect your Internet modem to the router. Most network modems connect via an Ethernet cable but USB connections are becoming increasingly common. The cable plugs into the router jack named "WAN" or "uplink" or "Internet." After connecting the cable, be sure to power cycle (turn off and turn back on) the modem to ensure the router recognizes it.
4.
Connect one computer to the router. Even if the router is a wireless model, connect this first computer to the router via a network cable. Using a cable during router installation ensures the maximum reliability of the equipment. Once a wireless router installation is complete, the computer can be changed over to a wireless connection if desired.
5.
Open the router's administration tool. From the computer connected to the router, first open your Web browser. Then enter the router's address for network administration in the Web address field and hit return to reach the router's home page.Many routers are reached by either the Web address "http://192.168.1.1" or "http://192.168.0.1" Consult your router's documentation to determine the exact address for your model. Note that you do not need a working Internet connection for this step.
6.
Log in to the router. The router's home page will ask you for a username and password. Both are provided in the router's documentation. You should change the router's password for security reasons, but do this after the installation is complete to avoid unnecessary complications during the basic setup.
7.
If you want your router to connect to the Internet, you must enter Internet connection information into that section of the router's configuration (exact location varies). If using DSL Internet, you may need to enter the PPPoE username and password. Likewise, if you have been issued a static IP address by your provider (you would need to have requested it), the static IP fields (including network mask and gateway) given to you by the provider must also must be set in the router.
8.
If you were using a primary computer or an older network router to connect to the Internet, your provider may require you to update the MAC address of the router with the MAC address of the device you were using previously. Read How to Change a MAC Address for a detailed description of this process.
9.
If this is a wireless router, change the network name (often called SSID). While the router comes to you with a network name set at the factory, you will never want to use this name on your network. Read How to Change the Router SSID for detailed instructions.
10.
Verify the network connection is working between your one computer and the router. To do this, you must confirmed that the computer has received IP address information from the router. See How to Find IP Addresses for a description of this process.
11.
(If applicable) Verify your one computer can connect to the Internet properly. Open your Web browser and visit a few Internet sites such as http://freecomputercourses.blogspot.com/
Connect additional computers to the router as needed. If connecting wirelessly, ensure the network name (SSID) of each is computer matches that of the router.
12.
Finally, configure additional network security features as desired to guard your systems against Internet attackers. These WiFi Home Network Security Tips offer a good checklist to follow.
Tips:
a)When connecting devices with network cables, be sure each end of the cable connects tightly. b)Loose cables are one of the most common sources of network setup problems.
What You Need:
1.A network router (wireless or wired)
2.Network adapters installed on all devices to be connected to the router
3.A working Internet modem (optional)
4.A Web browser installed at least one computer in the network
More Wireless / Networking How To's
June 24, 2009
Blog Roll
Procedure to add your blog into my blogroll:
Add my link to your blogroll and contact me:
Name of the blog:FREE COMPUTER TECHNICIAN COURSES
link : http://freecomputercourses.blogspot.com
June 22, 2009

Ethernet Cable - Color Coding Diagram
The information listed here is to assist Network Administrators in the color coding of Ethernet cables. Please be aware that modifying Ethernet cables improperly may cause loss of network connectivity. Use this information at your own risk, and insure all connectors and cables are modified in accordance with standards. The Internet Centre and its affiliates cannot be held liable for the use of this information in whole or in part 
The TIA/EIA 568-A standard which was ratified in 1995, was replaced by the TIA/EIA 568-B standard in 2002 and has been updated since. Both standards define the T-568A and T-568B pin-outs for using Unshielded Twisted Pair cable and RJ-45 connectors for Ethernet connectivity. The standards and pin-out specification appear to be related and interchangeable, but are not the same and should not be used interchangeably
T-568B Straight-Through Ethernet Cable


T-568B Straight-Through Ethernet Cable

The TIA/EIA 568-A standard which was ratified in 1995, was replaced by the TIA/EIA 568-B standard in 2002 and has been updated since. Both standards define the T-568A and T-568B pin-outs for using Unshielded Twisted Pair cable and RJ-45 connectors for Ethernet connectivity. The standards and pin-out specification appear to be related and interchangeable, but are not the same and should not be used interchangeably
T-568B Straight-Through Ethernet Cable

Both the T-568A and the T-568B standard Straight-Through cables are used most often as patch cords for your Ethernet connections. If you require a cable to connect two Ethernet devices directly together without a hub or when you connect two hubs together, you will need to use a Crossover cable instead.
RJ-45 Crossover Ethernet Cable

A good way of remembering how to wire a Crossover Ethernet cable is to wire one end using the T-568A standard and the other end using the T-568B standard. Another way of remembering the color coding is to simply switch the Green set of wires in place with the Orange set of wires. Specifically, switch the solid Green (G) with the solid Orange, and switch the green/white with the orange/white.
Ethernet Cable Instructions:
Pull the cable off the reel to the desired length and cut. If you are pulling cables through holes, its easier to attach the RJ-45 plugs after the cable is pulled. The total length of wire segments between a PC and a hub or between two PC's cannot exceed 100 Meters (328 feet) for 100BASE-TX and 300 Meters for 10BASE-T. Start on one end and strip the cable jacket off (about 1") using a stripper or a knife. Be extra careful not to nick the wires, otherwise you will need to start over. Spread, untwist the pairs, and arrange the wires in the order of the desired cable end. Flatten the end between your thumb and forefinger. Trim the ends of the wires so they are even with one another, leaving only 1/2" in wire length. If it is longer than 1/2" it will be out-of-spec and susceptible to crosstalk. Flatten and insure there are no spaces between wires. Hold the RJ-45 plug with the clip facing down or away from you. Push the wires firmly into the plug. Inspect each wire is flat even at the front of the plug. Check the order of the wires. Double check again. Check that the jacket is fitted right against the stop of the plug. Carefully hold the wire and firmly crimp the RJ-45 with the crimper. Check the color orientation, check that the crimped connection is not about to come apart, and check to see if the wires are flat against the front of the plug. If even one of these are incorrect, you will have to start over. Test the Ethernet cable.
Ethernet Cable Tips:
*A straight-thru cable has identical ends.
*A crossover cable has different ends.
*A straight-thru is used as a patch cord in Ethernet connections.
*A crossover is used to connect two Ethernet devices without a hub or for connecting two hubs.
*A crossover has one end with the Orange set of wires switched with the Green set.
Odd numbered pins are always striped, even numbered pins are always solid colored.
Looking at the RJ-45 with the clip facing away from you, Brown is always on the right, and pin 1 is on the left.
*No more than 1/2" of the Ethernet cable should be untwisted otherwise it will be susceptible to crosstalk.
*Do not deform, do not bend, do not stretch, do not staple, do not run parallel with power cables, and do not run Ethernet cables near noise inducing components
BASIC THEOREY

By looking at a T-568A UTP Ethernet straight-thru cable and an Ethernet crossover cable with a T-568B end, we see that the TX (transmitter) pins are connected to the corresponding RX (receiver) pins, plus to plus and minus to minus. You can also see that both the blue and brown wire pairs on pins 4, 5, 7, and 8 are not used in either standard. What you may not realize is that, these same pins 4, 5, 7, and 8 are not used or required in 100BASE-TX as well. So why bother using these wires, well for one thing its simply easier to make a connection with all the wires grouped together. Otherwise you'll be spending time trying to fit those tiny little wires into each of the corresponding holes in the RJ-45 connector.
For More Info..Visit: http://www.incentre.net/content/view/75/2/
June 17, 2009
Secrets Of SMPS Repair And Troubleshooting (Switch Mode Power Supply)
SMPS repair sometimes can be easy and sometimes are quite difficult to solve the problem. The power supply fault could be an open start up resistor only or could be even more than ten components burnt due to heavy lightning strike. In this article, I’m going to explain to you the power supply problems that caused by defective components at secondary side. Sometimes no power, power blink and low output power symptoms are due to problems in the main circuit board. It is not necessary the fault must be in the primary power section and shorted secondary output diodes.

The fault can be further down the secondary output lines which are in the main board. If you had measured all the components in the power supply section and could not find the defective component, then try troubleshoot components beyond the power supply section. A shorted small ceramic capacitor in the main board can cause the whole power supply to malfunction.
True case study- A Samtron Monitor 4Bn sent for repair with the complaint of no power. After troubleshooting the smps section for sometime, I’ve concluded that the power supply is working and suspect something shorted after the secondary output diodes and this made me to trace beyond the power supply unit. By using the explanation above, I managed to traced and found a shorted small resin ceramic capacitor located at the 80 volt line in the Monitor color board. The capacitor shorted to ground and made the power supply to stop operating.
The value of the shorted capacitor was .22 microfarad 100 volt. Replacing only the small capacitor brought the power supply back to life again. In smps repair, we as an electronic
repairer must know how to distinguish as which section is giving problem. Spending and concentrating your whole time to check on a working section is just a waste of time, you should only concentrate on section that have problems so that you could locate the fault and make the equipment work again.

Related Articles
How to Change Mother Boards in Desktop?
June 16, 2009
How to Configure Outlook 2007
Configuring your email client: Outlook 2007
Open Outlook 2007.
Click the Tools menu, and select Account Settings.
Configure Outlook 2007
or
From Microsoft Websites
Open Outlook 2007.
Click the Tools menu, and select Account Settings.
Configure Outlook 2007
or
From Microsoft Websites
June 12, 2009
How to Remove Multiboot Option in Windows XP
Dual Boot - Windows XP-Windows Vista
 If under various circumstances you had to install a second Windows OS on the same system, you should have already met the dual boot option. For those who do not know, the dual boot option appears when two or more Windows systems reside on the same computer at the same time.
 If under various circumstances you had to install a second Windows OS on the same system, you should have already met the dual boot option. For those who do not know, the dual boot option appears when two or more Windows systems reside on the same computer at the same time.
  It will pop up before booting the system permitting the user to select which OS will boot.
This option is very useful for those who own computers with older mainboards that do not provide a quick boot selection option.
Newer motherboards have this option by default and whenever two or more operating systems are available, you can simply press an F key which will determine a Bios window to emerge offering you the possibility to select the desired drive to boot.
Boot.ini, the house of the dual boot option Boot.ini is a system file found in the system root. Because it has a major importance for the booting process, Windows developers gave it hidden, system and read-only attributes.
Don't worry though, you can easily view it and even change the attributes by yourself.
Let's assume that you have the dual boot option enabled and because your second HDD broke down or you simply formatted it losing the second operating system, you want to get rid of the dual boot option. To do it, you need to edit the Boot.ini which can be done in multiple ways.Manual edit using the notepad or any other text editorBeing a plain text file editor isn't a big deal, as all it takes is a simple text editor.
Don't worry though, you can easily view it and even change the attributes by yourself.
- My Computer/Windows Explorer >
- Folder Options > View and check "Show hidden files and folders"
Let's assume that you have the dual boot option enabled and because your second HDD broke down or you simply formatted it losing the second operating system, you want to get rid of the dual boot option. To do it, you need to edit the Boot.ini which can be done in multiple ways.Manual edit using the notepad or any other text editorBeing a plain text file editor isn't a big deal, as all it takes is a simple text editor.
Therefore, the common Notepad provided by my Windows would be more than enough. First of all, remove the read-only attribute because you need to save the file after you have edited it. Because we are dealing with an important system file and any mistake would lead to the impossibility of booting the system, be smart and make a backup copy.
In case something happens, you can copy back the file from another source such a floppy, USB flashpen or other HDD.Comfortable method to change the "timeout"When the dual boot option works, you are provided with a timeout in order to select the desired OS.
By default, this timeout is 30 sec,If no OS is selected, after 30 seconds, the primary Windows will boot. In case you consider the timeout too high, you can lower it.
Once the system configuration window pops up, you will notice that Boot.ini has its own tab. Select that tab and where you see "timeout," set it to a lower or higher value. Remove/Add Operating Systems in the dual boot menuThis is the main issue.
In case something happens, you can copy back the file from another source such a floppy, USB flashpen or other HDD.Comfortable method to change the "timeout"When the dual boot option works, you are provided with a timeout in order to select the desired OS.
By default, this timeout is 30 sec,If no OS is selected, after 30 seconds, the primary Windows will boot. In case you consider the timeout too high, you can lower it.
- Go to Start Click on Run
- Type msconfig.
Once the system configuration window pops up, you will notice that Boot.ini has its own tab. Select that tab and where you see "timeout," set it to a lower or higher value. Remove/Add Operating Systems in the dual boot menuThis is the main issue.
Step 1:Right click on My Computer icon and select Properties.
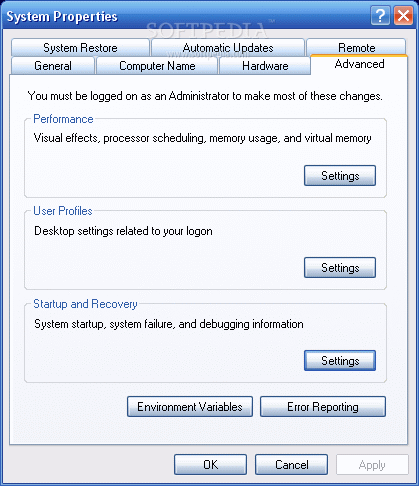
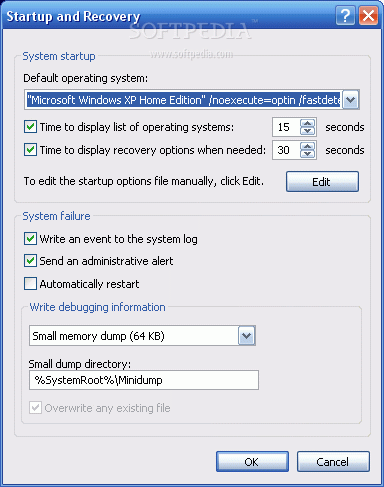
Here, you can both edit the timeout value and modify the Boot.ini file by clicking Edit. If you remove the second operating system from Boot.ini, the dual boot option won't appear before booting.
[Don't forget to backup the file in any situation. It will keep you out of trouble]
For more Reading Visit
Intel Atom Processor
Intel Atom Processor


Produced : 2008–present
Common manufacturer(s ) : Intel
Max. CPU clock : 800 MHz to 2 GHz
FSB speeds : Data transfers at 400 MHz to 667 MHz
Min. feature size : 45nm
Instruction set : x86, x86-64 (not for the N and Z series)
Cores : 1, 2
Package(s) : 441-ball µFCBGA
Core name(s) : SilverthorneDiamondville
Common manufacturer(s ) : Intel
Max. CPU clock : 800 MHz to 2 GHz
FSB speeds : Data transfers at 400 MHz to 667 MHz
Min. feature size : 45nm
Instruction set : x86, x86-64 (not for the N and Z series)
Cores : 1, 2
Package(s) : 441-ball µFCBGA
Core name(s) : SilverthorneDiamondville
Intel Atom is the brand name for a line of x86 and x86-64 CPUs (or microprocessors) from Intel, designed in 45 nm CMOS and used mainly in Notebooks. Silverthorne is called the Atom Z series and Diamondville is called the Atom N series. As of June 2009, the most used chips in the Netbook retail market are Z520, Z530, and N270
Prior to the Silverthorne announcement, outside sources had speculated that Atom would compete with AMD's Geode system-on-a-chip processors, used by the One Laptop per Child project, and other cost- and power-sensitive applications for x86 processors. However, Intel revealed on October 15, 2007 that it was developing another new mobile processor, codenamed Diamondville, for OLPC-type devices.
"Atom" was the name under which Silverthorne would be sold, while the supporting chipset formerly code-named Menlow was called Centrino Atom. Intel's initial Atom press release only briefly discussed "Diamondville" and implied that it too would be named "Atom", strengthening speculation that Diamondville is simply a lower-cost, higher-yielding version of Silverthorne with slightly higher TDPs at slightly lower clock speeds.
At Spring Intel Developer Forum (IDF) 2008 in Shanghai, Intel officially announced that Silverthorne and Diamondville are based on the same microarchitecture. Silverthorne will be called the Atom Z series and Diamondville will be called the Atom N series. The more expensive lower-power Silverthorne parts will be used in Intel Mobile Internet Devices (MIDs) whereas Diamondville will be used in low-cost desktop and notebooks. Several Mini-ITX motherboard samples have also been revealed.Intel and Lenovo also jointly announced an Atom powered MID called the IdeaPad U8. The IdeaPad U8 weighs 280 g and has a 4.8 in (12 cm) touchscreen providing better portability than a netbook PC and easier Internet viewing than a mobile phone or PDA.
Atom N series
On March 2, 2008, Intel announced a low-cost mobile processor (code-named Diamondville) to be used in the Classmate PC Netbook. It is used in Intel's low-cost Mini-ITX motherboards (code-named "Little Falls") and in a number of netbooks.It will supersede Conroe L as the N270 (2.5 W TDP) for netbooks and as 230 (4 W TDP) for nettops, each running at 1.6 GHz per core with a 533 MHz FSB speed. An N280 with a 1.66 GHz clockspeed and a 667 MHz FSB has since appeared.
Atom 300 series
On September 22, 2008, Intel announced a new dual-core processor (unofficially code-named Dual Diamondville) branded Atom 330 of the Atom 300 series to be used in desktop computers. It runs at 1.6 GHz and has a 8 W TDP rating. Its dual core comprises two Diamondville dies next to each other on a single package (substrate).
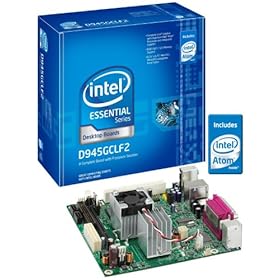
The intel D945GCLF2 is a mini-ITX board that contains the Atom 330.
The Zotac IONITX-A-U is a board that pairs the Atom 330 with NVIDIA's GeForce 9400M chipset. The intel Atom CPU, when paired with NVIDIA's GeForce 9300M or 9400M chipset, is often called the NVIDIA ION platformRead More >>>>>>>>>>>>>>
Prior to the Silverthorne announcement, outside sources had speculated that Atom would compete with AMD's Geode system-on-a-chip processors, used by the One Laptop per Child project, and other cost- and power-sensitive applications for x86 processors. However, Intel revealed on October 15, 2007 that it was developing another new mobile processor, codenamed Diamondville, for OLPC-type devices.
"Atom" was the name under which Silverthorne would be sold, while the supporting chipset formerly code-named Menlow was called Centrino Atom. Intel's initial Atom press release only briefly discussed "Diamondville" and implied that it too would be named "Atom", strengthening speculation that Diamondville is simply a lower-cost, higher-yielding version of Silverthorne with slightly higher TDPs at slightly lower clock speeds.
At Spring Intel Developer Forum (IDF) 2008 in Shanghai, Intel officially announced that Silverthorne and Diamondville are based on the same microarchitecture. Silverthorne will be called the Atom Z series and Diamondville will be called the Atom N series. The more expensive lower-power Silverthorne parts will be used in Intel Mobile Internet Devices (MIDs) whereas Diamondville will be used in low-cost desktop and notebooks. Several Mini-ITX motherboard samples have also been revealed.Intel and Lenovo also jointly announced an Atom powered MID called the IdeaPad U8. The IdeaPad U8 weighs 280 g and has a 4.8 in (12 cm) touchscreen providing better portability than a netbook PC and easier Internet viewing than a mobile phone or PDA.
Atom N series
On March 2, 2008, Intel announced a low-cost mobile processor (code-named Diamondville) to be used in the Classmate PC Netbook. It is used in Intel's low-cost Mini-ITX motherboards (code-named "Little Falls") and in a number of netbooks.It will supersede Conroe L as the N270 (2.5 W TDP) for netbooks and as 230 (4 W TDP) for nettops, each running at 1.6 GHz per core with a 533 MHz FSB speed. An N280 with a 1.66 GHz clockspeed and a 667 MHz FSB has since appeared.
Atom 300 series
On September 22, 2008, Intel announced a new dual-core processor (unofficially code-named Dual Diamondville) branded Atom 330 of the Atom 300 series to be used in desktop computers. It runs at 1.6 GHz and has a 8 W TDP rating. Its dual core comprises two Diamondville dies next to each other on a single package (substrate).
The intel D945GCLF2 is a mini-ITX board that contains the Atom 330.
The Zotac IONITX-A-U is a board that pairs the Atom 330 with NVIDIA's GeForce 9400M chipset. The intel Atom CPU, when paired with NVIDIA's GeForce 9300M or 9400M chipset, is often called the NVIDIA ION platformRead More >>>>>>>>>>>>>>
Advantages of Intel Atom Processor
All Intel® Atom™ processors feature:
1.Small Form Factor CPU Package
2.Low TDP
3.Power Optimized Front Side Bus
4.Enhanced Data Prefetcher & Enhanced Register Access Manager
1.Small Form Factor CPU Package
2.Low TDP
3.Power Optimized Front Side Bus
4.Enhanced Data Prefetcher & Enhanced Register Access Manager

Related Articles
How to Change Mother Boards in Desktop?
June 10, 2009
Adobe Dreamweaver CS4 Tutorial
 Welcome to the Dreamweaver CS4 tutorial!
In this tutorial, we will explore the new features of Dreamweaver CS4, the Dreamweaver CS4 interface, new CSS support, how to create a new site, inserting content, and more. This instruction-packed tutorial will help you on your way to becoming an Adobe Dreamweaver CS4 expert!
What is Dreamweaver CS4?
Dreamweaver is a powerful but easy-to-use web site development program that bridges the gap between designer and developer. Although it includes advanced features for developing complex data-driven applications, Dreamweaver’s intuitive interface and extensive libraries let even the novice web designer develop a professional web site quickly and easily.
If you’re new to CSS, Dreamweaver includes a large number of predefined CSS layout pages, which make it possible to create professional-looking layouts that conform to the latest in web standards.
How To Create Your Own Website Or Blog For Free Using Weebly
How To Create Your Own Website Or Blog For Free Using Weebly
Do you lack web designing skills or are you confused on how to design a website which looks professional, is attractive, search engine friendly, has columns, pictures, setup options, audio player features, setup to add photo galleries with instant uploading of pictures from your desktop directly without using a ftp software and lot more features? Try Weebly, which is an online website creation tool helpful for designing a beautiful website or a blog within minutes and setting it up on your own domain name.
The fun filled web design experience begins with the creation of a unique username and password. After signing in, all that’s left to do is create a name for your site and begin the actual placement and site design work. And that’s where the fun begins.

Once an account is open, you can immediately click Create a Site and get started.
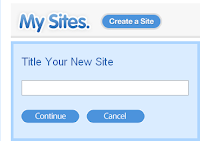
The editing tools are simple drag and drop. Pick one of the Designs, then choose from Elements to find things to add to your pages, create new pages under the Pages menu and fill in the information about your site in Settings.

When you’ve added all the text, pages, photos, or other elements you want, click Publish. The first time you publish, you must decide whether to publish on the site(yoursitename.weebly.com) or set it up on your own domain.
It will also let you buy a Domain Name or publish a site to a domain you already own. These two options involve purchasing and setting up a domain with a domain registrar, then making sure that it has the information about where to publish your web pages.
Once your site has been published the first time, you can sign in to weebly and edit it at any time. All the sites you have will show up on the its homepage when you log in. Simply click Edit Site and you’re ready to modify or add pages.

To use Weebly, Internet Explorer 5.5+ or IE7 and Firefox 1.5+ or 2.0 on Windows, Firefox 1.5+ or 2.0 on Linux and Firefox 1.5+ or 2.0 on Mac OS X is needed.
5 Methods to Enable Task Manager
Task Manager Has Been Disabled By Your Administrator Step by Step Methods for Fixing Task Manager
Listed below you will find the many ways to reenable Task Manager along with an automatic method that works wonders.
To open the Task Manager, you normally would do one of the following:
1.Press CTRL-ALT-DEL on the keyboard
To open the Task Manager, you normally would do one of the following:
1.Press CTRL-ALT-DEL on the keyboard
Method 1 - Using the Group Policy Editor in Windows XP Professional
1.Go to Start, Run, type gpedit.msc and click OK.
2.Under User Configuration, Click on the plus (+) next to Administrative Templates Click on the plus (+) next tSystem.
2.Under User Configuration, Click on the plus (+) next to Administrative Templates Click on the plus (+) next tSystem.
3.Then click on Ctrl+Alt+Delete Options Find Remove Task Manager in the right-hand pane and double click on it Choose the option "Not Configured" and click Ok.
4.Close the Group Policy
Method 2: Change the Task Manager Option through the Run line
- Go to Start Menu click Run.Type the following command exactly and press Enter.
REG add HKCU\Software\Microsoft\Windows\CurrentVersion\Policies\System /vDisableTaskMgr /t REG_DWORD /d 0 /f
Method 3: Change Task Manager through a Registry REG file
Method 3: Change Task Manager through a Registry REG file
1.Go to Start, Click Run, and type Notepad and Hit Enter
2.Copy and paste the information between the dotted lines into Notepad and save it to your desktop as taskmanager.reg
[HKEY_CURRENT_USER\Software\Microsoft\Windows\CurrentVersion\Policies\System]"DisableTaskMgr"=dword:000000004: Delete the restriction in the registry manually
3.Go to Start, Run, and type REGEDIT and press Enter
4.Navigate to the following branchHKEY_CURRENT_USER \ Software \ Microsoft \ Windows \ CurrentVersion \ Policies\ SystemIn the right pane, find and delete the value named DisableTaskMgr Close the registry editor
Method 4: Download and Run FixTaskManager program Click on the following links and

Download the program FixTaskManager to your Desktop Double-click on the file FixTaskManager on your desktop and run it.
Related Articles
June 9, 2009


June 6, 2009
About Me
 I am chandrashekhar bhat and I write Tech-chand blog. The main purpose of this site is to help you to take maximum advantage of the now days software tools and web technologies, digital world revolutions at your disposal so that you love to spend more time on these aspects
I started my blog in May 2009 .I spent two years as a Computer Hardware Engineer, and now working as a Computer Science lecturer in India.
I am a tech freak so I like to explore new technical stuffs as and when they are there. I am not a full time blogger but a free computer technician course is my attempt to provide the viewers a place where they can find solutions to their problems and a place to discuss new tech stuffs.
I’m planning a longer post on this later – but consider giving your readers a way of getting in touch with you. Again its about transparency and interactivity.
Contact Us
E-mail-chanddra2000@gmail.com


June 4, 2009
How to Install Linux-A Guide
Linux Installation
The following resources provide guidance and step-by-step instructions for installing Linux:
Linux Pre-Installation Check List Common questions about system configuration, hardware, and software Complete the checklist before beginning the install process for a smoother installation.
Linux Installation and Getting Started Guide General installation instructions as well as instructions specific to Debian, Red Hat, Caldera, Slackware, S.u.S.E.
The Official Red Hat Linux Installation Guide The official manual guides for installing the Red Hat Linux distribution.
Red Hat Installation FAQA general guide to installing the Red Hat Linux distribution
.
Red Hat Linux Installation from the CD-ROM Installing Red Hat from a set of CD-ROMs.
Red Hat Hard Drive Installation Installing Red Hat via FTP to a local hard drive.
Procedure to Install Slackware Linux Step-by-step instructions for installing Slackware version 1.0.
Shad's Linux Installation GuideFocuses primarly on the installation of Slackware.
Linux Online BookstoreSells a wide variety of books on getting started and installing Linux. Many come with a complimentary CD-ROM.
Non-English Resources
Installation and Getting Started Guide - Russian Translation
Installation and Getting Started Guide - Spanish Translation
Subscribe to:
Posts (Atom)