The Ubuntu installation guide: last updated october 2009
Table of contents
- Install from CD
- Install with Wubi
- Install in EXT3 Partition
- Install from USB
When it comes to installing Ubuntu, there are so many useful snippets of information on blogs and guides all over the internet. If you Google “How to install Ubuntu”, you’ll see what I mean.
For an Ubuntu beginner or curious Windows intermediate user however, there’s no single, simple source of information when it comes to trying out your first Ubuntu installation. One thing I have noticed is that there’s a lot of technical jargon and sometimes unnecessary terminal commands in lengthy forum posts, but no simple “how to” guides, which I think might put some people off! A shame, when you think about how easy Ubuntu is to install, use and tweak to look really cool!
This post will talk you through your first Ubuntu installation, hopefully teaching you everything you need to know to give Ubuntu a try without breaking or removing your existing Windows installation. The end result will be a “vanilla” Ubuntu Installation running simultaneously with your Windows installation using either the GRUB bootloader, or WUBI, depending on how far you’d like to go on your first Ubuntu experience.

I hope my guide makes installing Ubuntu an enjoyable, simple experience. By the end of the guide you should have a dual boot Windows / Ubuntu machine that happily plays music, video, and acts as a perfectly usable home office computer with Openoffice 3.0. For the really adventurous you could even run Windows XP inside Virtualbox, which is linked to later on in the guide. The Ubuntu OS is unique and seriously cool, so, enjoy the trip.

If you’re planning on installing the latest version of Ubuntu (Jaunty Jackalope 9.04) you can install Ubuntu straight from the CD inside Windows or from a USB stick and the install process can takes care of formatting your hard drive partition for you. You might not yet have a spare partition to do this, so I’ve covered shrinking your existing Windows partition to make space for Ubuntu here.
How to install Ubuntu from CD
1) Download the Ubuntu ISO from http://www.ubuntu.com/getubuntu/download and save to your desktop
2) Burn the ISO image to a blank CD using Roxio CD creator or similar:
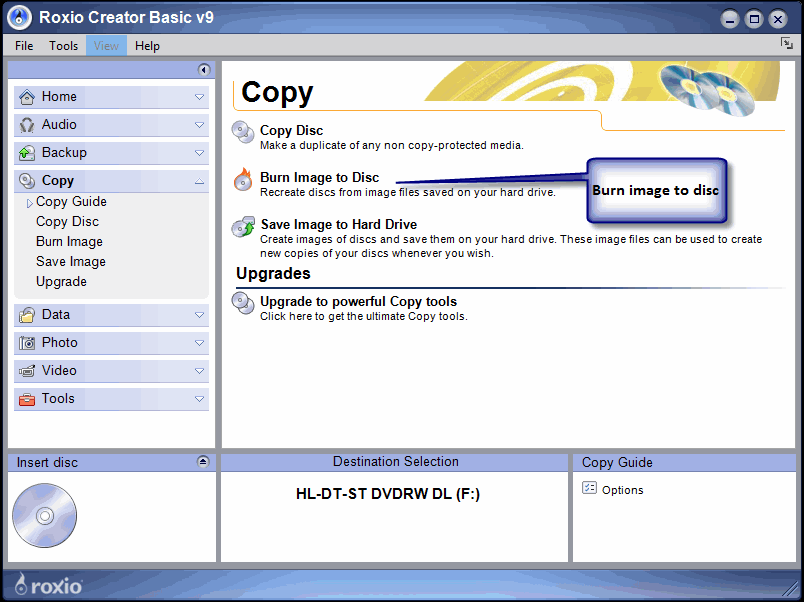
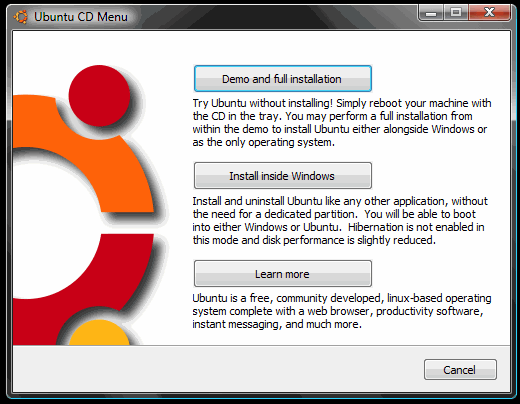
3) Run the CD from “My Computer” – the CD should ask permission to run at which point you’ll see this option screen:
Install Ubuntu with Wubi
4) If you’d like to install Ubuntu using Wubi, select “install inside Windows” and follow the instructions. Installing with WUBI is ideal for a first taste of Ubuntu as you can remove from add/remove programs in Windows later on. This install process is really easy but you don’t get the same performance as if Ubuntu had a separate partition running on its EXT3 file system. The following screens are all based on the Wubi installer process, so you can follow the rest of the instructions below.
If you’d like to install Ubuntu separately to Windows, then skip to point 7) below.
Here’s what you see next:

If you’ve got the space on your hard drive, go for 30gb or more for the installation size.
5) Now configure your installation using the simple settings options. You can specify the location of the Ubuntu installation on your Windows partition, the size of the Ubuntu installation, the Ubuntu flavour (Ubuntu, Kubuntu, Xubuntu, etc), your preferred language, and a username and password for the Ubuntu system.
When you click install, you’ll see this screen:
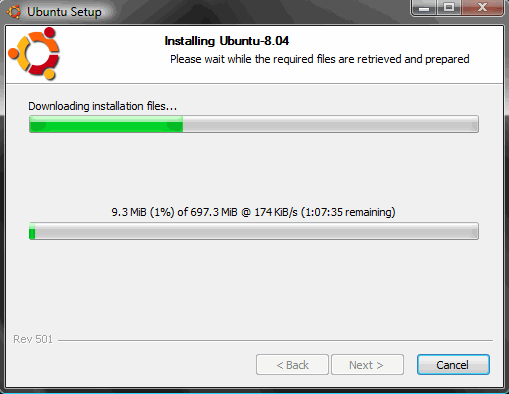
As soon as the files have finished downloading, you’ll see this:

6) That’s it! Click reboot now, and select “Ubuntu” on the startup screen. You now have a fully functional dual boot Windows / Ubuntu machine.
Install Ubuntu on a single (EXT3) partition (separately to Windows)
7) Click “Demo and full installation” and your computer will restart and boot into Ubuntu.
It’s worth saying at this point that you’re about to install Ubuntu on an entirely separate drive partition. That means, you need to make sure you have enough space on your computers hard drive to accomodate the new setup. Keir Thomas found that a partition less than 4gb would lead Ubuntu to crash during install in his first look at Ubuntu 9.04 over at Lifehacker.
Here’s a guide on how to resize or shrink your Windows Vista partition. Follow those instructions before you reboot into the live version of Ubuntu and you’ll have a really easy time during the following steps. Maybe you’d like to install from a USB? Let’s have a quick look at the process of installing from a USB before we continue:
Here’s how to install Ubuntu on a USB drive from Windows Vista:
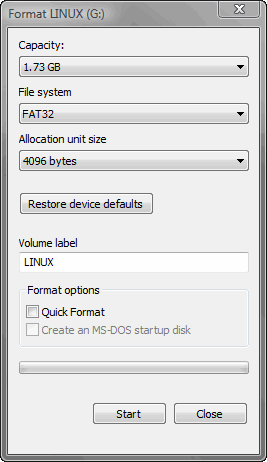
 Format your USB stick with a FAT32 partition from Windows. You can get to the format dialogue by opening My Computer and right mouse clicking the removable drive icon. Click “Format” and follow the settings in the image below. You need a minimum 2gb USB stick.
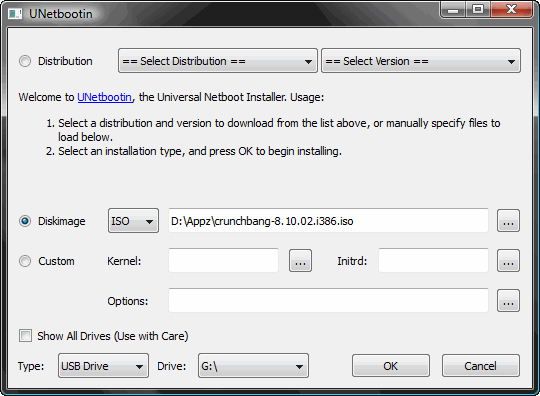
9) Download UnetBootin. UNetbootin allows for the installation of various Linux/Ubuntu distributions to a partition or USB drive, so it’s no different from a standard install, only it doesn’t need a CD. The coolest thing about the application is that it’s a “portable” app. You don’t need to install it into Windows meaning UNetbootin will run on your Windows PC without “admin” privileges.

The new version of Ubuntu isn’t in the Distribution list supplied with UNetbootin yet, so use the downloaded Ubuntu ISO from earlier on. Add the ISO using the “Diskimage”, make sure your USB drive is selected below and click OK.
The ISO transfers to the USB pretty quickly, so soon after you click OK you’ll see this screen:

10) That’s it – when the installation process is complete, restart your computer and make sure it’s set up to boot from USB. On my HP Laptop, pressing F9 on the boot screen shows a boot order menu. Selecting “USB Hard Drive” follows a black screen, an Ubuntu logo, and finally, your new Ubuntu desktop appears.
Completing your Ubuntu installation, step by step
Installing Ubuntu is so easy that it requires very little effort past this point. If you’ve managed to repartition your hard drive and restart your computer you’ll sail through the next few steps:
11) Click “install” on the live desktop (top left)

12) Choose your language in the welcome screen

13) Choose your location

14) Choose your keyboard layout

15) Set up your disk partition. This is probably the most “technical” part of the installation. When I shrunk my Windows Vista drive volume, I never formatted the new partition, which means the “use the largest continuous free space” option works nicely:

16) Choose your username and password:

17) Migrate your Windows documents and settings

18) You’re now ready to install your new Ubuntu installation

19) When the installation has finished, restart your computer (you’ll be instructed to remove your cd rom or USB drive). You’re now ready to begin using Ubuntu!
Useful tips and resources for Ubuntu
Over the months, I’ve compiled a number of useful tips and hints to get you started in using your new operating system. Here’s a few that people have found most useful:
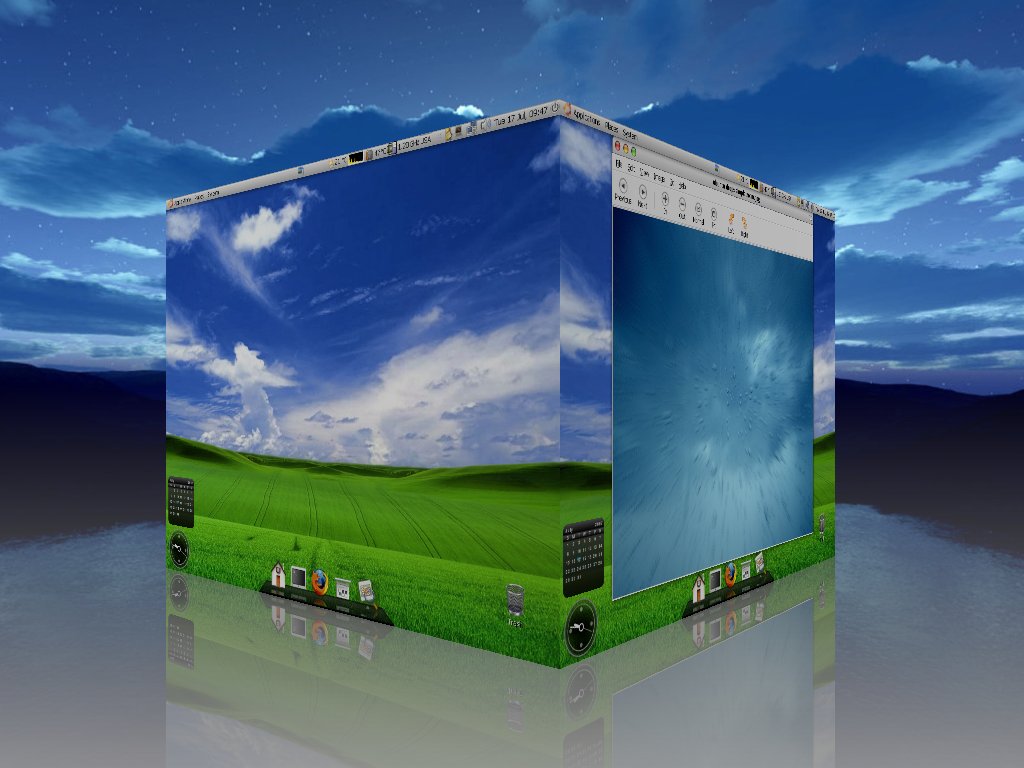
When you first login you’ll notice the system beep is a little annoying. Here’s how to turn it off. Having problems setting up your wireless network? Use this guide to set it up. Want to run Office 2007 or Windows XP from inside Ubuntu? Use this guide to install Virtualbox. Want to have that amazing 3d cube desktop? You’ll need to install Compiz. Want to make your installation look absolutely amazing? Check this post for a beautifully minimalist Ubuntu desktop powered by Conky. Finally, why not try installing boxee inside Ubuntu to watch a lot of great, free TV!
Ubuntu is a brilliantly simple, easy to use, free and powerful operating system. I hope this guide helps you get on your way. Any feedback? Leave comments below.